The December to January part of the food garden season is a busy time in the food garden. Veggie Patch Basics - 6 covers this period and aims to help you make your food garden even more productive and successful.
 |
| Pink Eye potato flowers |
Blog post Veggie Patch Basics-1 covered where to put your veggie garden and compost area, and establishing four areas (Legumes, Big Eaters, Roots and Solanums) in your veggie garden.
Veggie Patch Basics-2 then covered the April-May period. Veggie Patch Basics-3 June-July, Veggie Patch Basics-4 covered August-September, and Veggie Patch Basics-5 October-November. This new post covers December and January.
Part 6: December - January
Don't forget your compost heaps!
Many compost heaps are started with the very best of intentions, but as the season progresses, they are forgotten. As the weather warms up and rain fall becomes intermittent one thing in particular is often missing from neglected compost heaps: water.
Go to the tip shop and get yourself an old piece of carpet (or buy some thick hessian from Bunnings). Put that on top of your compost heap. It will keep moisture from evaporating in warm weather. In the absence of rain, water your compost heap regularly, so that it is always moist.
Keep adding plant material and kitchen scraps. A sprinkling of complete organic fertiliser or blood and bone and coffee grinds (if you have them) will all help. Turn over your compost from time to time. This adds the important ingredient of air to the composting process, and mixes browns and greens.
It's important not to have have a thick layer of bean stalk waste, then a thick layer of grass clippings on top of that, followed by a thick layer of something else. The more you mix it all, the better your composting process will work.
When there is useful rain this summer, remove the carpet piece temporarily, so your compost heap benefits from the natural downpour. Those who have a compost bin, take its lid off during rain falls. Rain really helps the composting process.
Pest control
There are a lot more pests in food gardens when the weather is warm. For many people pest control automatically means using poisons! However, using poisons can have unintended consequences, for instance:
- Poisons can end up in the produce that you grow and eat. If that happens, you undo one of the reasons for growing your own.
- Some pesticides are narrow-spectrum, which means they kill just the type of insect or pest they are intended to kill. Most pesticides, however, are broad-spectrum. They kill a wide range of insects, including beneficial insects such as pollinators (bees etc.) and predators that help you to get rid of your garden pest (ladybirds etc.) .
Best-practice safe pest-control for food-gardeners and farmers involves (in this order):
- Make the environment that the crop grows in as healthy as possible. This will result in strong plants that are not targeted by pests.
- Don’t do anything that may actually attract pests and make it easy for them to get established. An example is watering plants in the evening, so leaves stay wet all night, rather than watering them early in the morning, when water soon evaporates.
- Minimise the chances of a pest being able to reach your crop.
- Catch pests that do reach your crop and remove them.
- If these strategies are unsuccessful, and you really need to get rid of this pest, use a pesticide that only targets that pest, and nothing else.
You can find more about each of these steps in the Safe Pest Control series on the Food Garden Group blog.
Foliar feeding
Foliar feeding is feeding the leaves of plants with fertilisers dissolved in water. It is an alternative to feeding fertilisers via the soil they grow in. Seasol and PowerFeed are brand names of two organic products that can be dissolved in water. There are many other similar products.
I recommend that early in the morning once a fortnight you water one of these products diluted with water to the leaves of plants. You will find that your plants will become stronger and healthier as a result of doing this.
Legume area
Peas, broad beans until mid-November, then beans for the second part of the season
Where are we at?
Early in the season the harvest from broad beans started with picking leaves and using them in stir fries and salads. When small beans began to develop we picked many of those, sliced them up whole, and froze batches of them. When the beans became too large and stringy to do that we began to discard the bean hulls and used the beans. Now the beans are really large, and not so tender anymore, so I will remove these plants soon to make way for the next crop. However, if you like large broad beans, you can continue to harvest them for quite a while yet.
In many gardens the Rust fungus (see photo below) will have arrived on the wind. It has settled on some broad bean leaves, but it has not affected my crop, so I ignore it. In a previous episode of this series I explained that I plant broad beans in blocks, not rows, because I use them to add nitrogen to the soil. The disadvantage of planting in blocks is that there is less ventilation, and therefore more chance of attracting Rust. If you want to minimise the chances of Rust, remove affected leaves from your garden as soon as you see any, and plant your broad beans in rows with plenty of space around them for ventilation.
 |
| Rust on broad bean leaves |
The peas in my Legume area have produced well, but for a relatively short period of time. In most years peas begin to develop signs of mildew (the white spots in the photo below) as soon as rain fall or overhead irrigation takes place in warmer weather. This year was no different. The bushes now look absolutely miserable, and I will soon remove them to make way for beans. I have come to accept this as normal. You can hold back the inevitable for a little while by spraying diluted milk (for a recipe see Preventing and Overcoming Mildew), but I find that in the end the mildew always wins. Not a problem if you had a good crop of peas.
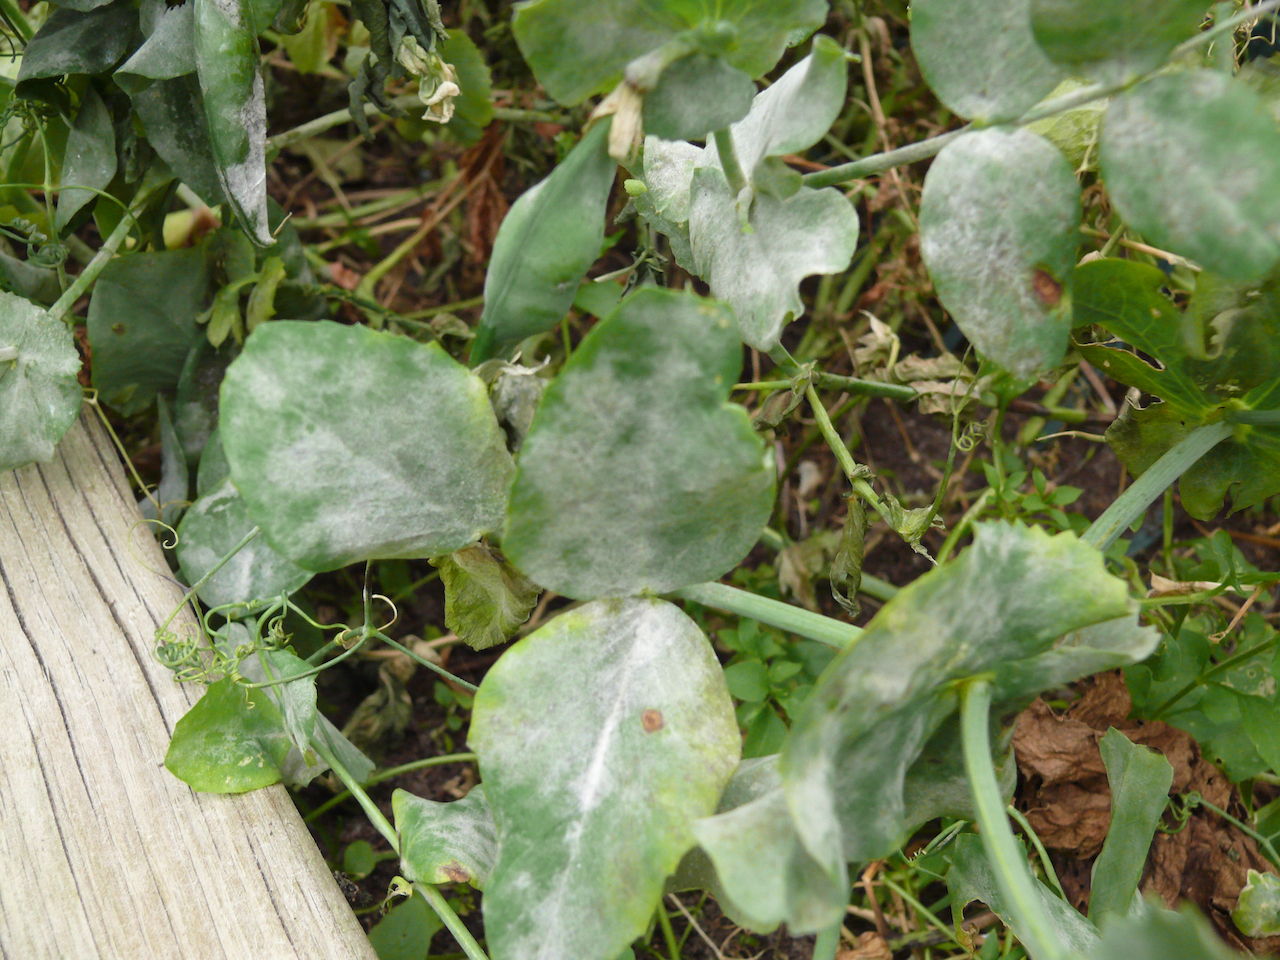 |
| Mildew in action |
A food garden will always have a few pests. Only take action against pests that have an impact on your crops. Learn to live with the ones that have little or no affect.
Now you know why peas and broad beans are best sown in late autumn or winter. Plant them at other times, and they will be much more affected by pests. One year I sowed peas in early January as an experiment. They came up, produced a small number of peas in record time, and then, after just one week of producing ripe peas, they were completely overcome by mildew.
When it is time to remove your pea and bean plants ......
- Collect the peas or beans that are still on the bushes. They may be large. They may be fat. They may have completely dried out in the sun, but that is precisely what you want, because these are the seeds that will give you to the same peas or beans again next season, without having to buy any. There is one condition: the varieties you bought need to be are heirloom, not hybrid! Check seed packets if you are not certain. Saving seed of hybrid plants will seldom lead to success as seeds from these plants will not create plants with the same characteristics as their parents. For more info about the differences between heirloom and hybrid see Heirlooms and Hybrids on this blog.
- Always cut pea and bean plants off at ground level with secateurs. Leave the roots in the soil. Plants in the Legume family of plants form nodules on their roots that contain nitrogen (see photo below). If you leave the root in the soil it will die and the nitrogen will be added to the soil.
 |
| Nodules on pea roots |
- Please add all the above-ground plant material to your compost heap. It will contain a lot of fibrous material that will contribute to making good compost.
- Contrary to a widely-held misconception pea and bean stalks contain very little nitrogen. Pea straw is a great mulch but it adds little or no nitrogen to your soil.
- Good composting will kill rust and mildew, so add pea and bean debris to your compost heap if you trust your composting practices. If in doubt, take rust or mildew affected plant debris out of your garden.
By the way, the first dot point above illustrates why it is a good idea to keep seed packets, even if they are empty. You may not remember whether the seed you bought was a heirloom variety. The packet will tell you. If it does not, it is very likely that the seed is hybrid.
Beans are a summer vegetable. If you sow them too early in the season in cold soil they may not germinate. If they do, the plants will not be happy. In most years mid-November to mid-December is the perfect time to sow beans, but I have sown beans in early January with good results.
It is worth considering what beans to sow in terms of the amount of work they will need:
- Bush beans: easy to grow, don't need any support, sown now they will produce beans by March. Bean bushes are wider than you think. Sow them at least 30 centimetres (ideally 40 centimetres) apart.
- Climbing beans: same time frame, but they will need a support, which can be fun to erect and ornamental, or a nuisance if you are don't have the time to put up the structure. Make it strong - the first year I put up a bean trellis it was blown over in a big storm. Bean poles, stakes and string, rusting rio mesh, arches - make it an artwork!
- Perennial beans: theses are climbing beans of which you remove the dead stalks at the end of the season, making sure not to disturb the soil they grew in. They re-emerge above ground and produce more beans the next season. Scarlet Runner is an example of a bean variety that can last a number of seasons if you do not have overly frosty conditions over winter. Using perennial beans can be attractive in that you can put in place a supporting structure that stays in place for a number of years. However, you lose the wonderful nitrogen-fixing role that the beans play in crop rotation, so I would always have non-perennial beans as well.
I sow both bush and climbing beans. One will have ripe beans later than the other, so it means fresh beans over a longer period. You can help this process by sowing one lot early, and another lot late.
Last year I planted my bush beans on 21st December. I picked my first beans on 6th March.
I planted climbing beans on 2nd January. I picked my first beans in early April. That is late but not too late.
You could have ripe beans much earlier by beginning to plant mid November if the weather is not cold.
Beans need well-draining soil. I plant my beans where I had broad beans and peas before, so they benefit from the nitrogen that the peas and broad beans before them fixed in the soil. I don't give them any additional compost or fertiliser.
Sow beans a centimetre or so below soil level, and then lightly press the soil to get rid of air pockets. Keep the soil moist at all times (sometimes easier said than done in warm weather). As with peas you can temporarily cover them with a plank, or planks, to keep soil moist and deter birds or whatever you have in your garden, from eating the beans. If you don't use planks keep pests out by covering the soil with mesh or netting until the beans germinate.
Check at least daily and water when needed. The first bean may be above ground 8 days after sowing.
Big Eater area
Broccoli, cauliflower, cabbage, spinach and Asian Greens over winter, followed by, for instance, pumpkins, silverbeet, corn, lettuce, radish, zucchini, corn and cucumber over summer
Where are we at?
Winter brassicas have long gone in most gardens. There is so much choice in regard to what to grow next in this area, that it can be overwhelming. What you grow will be determined by what your household likes (happy with corn or do they hate corn?). What you decide to grow in suburban gardens will also depend on how much space you have.
This spring I grew Butternut pumpkin and zucchini seedlings from seed and also some Asian Greens and Iceberg lettuce, and that is all I will have space for in my Big Eater area over summer. The photo below shows part of this area at the time of planting. You may think that I could have a lot more in this area, but come February it will be completely filled and overflowing with large pumpkin leaves. If you plant other vegetables in this same area they will soon be throttled by a sea of pumpkin leaves.

When I plant these seedlings I first put a handful of complete organic fertiliser in the plant hole, mix it with the soil in the bottom of the hole, and then plant the seedling, not too shallowy, so that surrounding soil does not dry out on hot summer days. The whole bed is covered in mulch, again to keep moisture in.
When planting pumpkin plants, place a stake next to each seedling. That may seem pointless right now (😂), but when later in the season you want to hand-water your pumpkin plants, it will be very useful to know where in the sea of leaves their roots are.
Whatever you plant in the Big Eater area, give every plant some complete organic fertiliser in its plant hole, and always consider how big the plant might be when it is fully grown. Plant the next plant with that size in mind, with a bit of extra space, so fully grown plants don't touch, which is best for pest control and ventilation.
Many people grow brassicas over summer. Broccoli, cauliflower, cabbage and Kale will grow quickly and succesfully over summer, but you will have to protect them against leaf-munching caterpillars and aphids.
Caterpillars can be controlled organically in a number of effective ways:
- Manual removal: inspect your plants thoroughly once a day and manually remove all caterpillars.
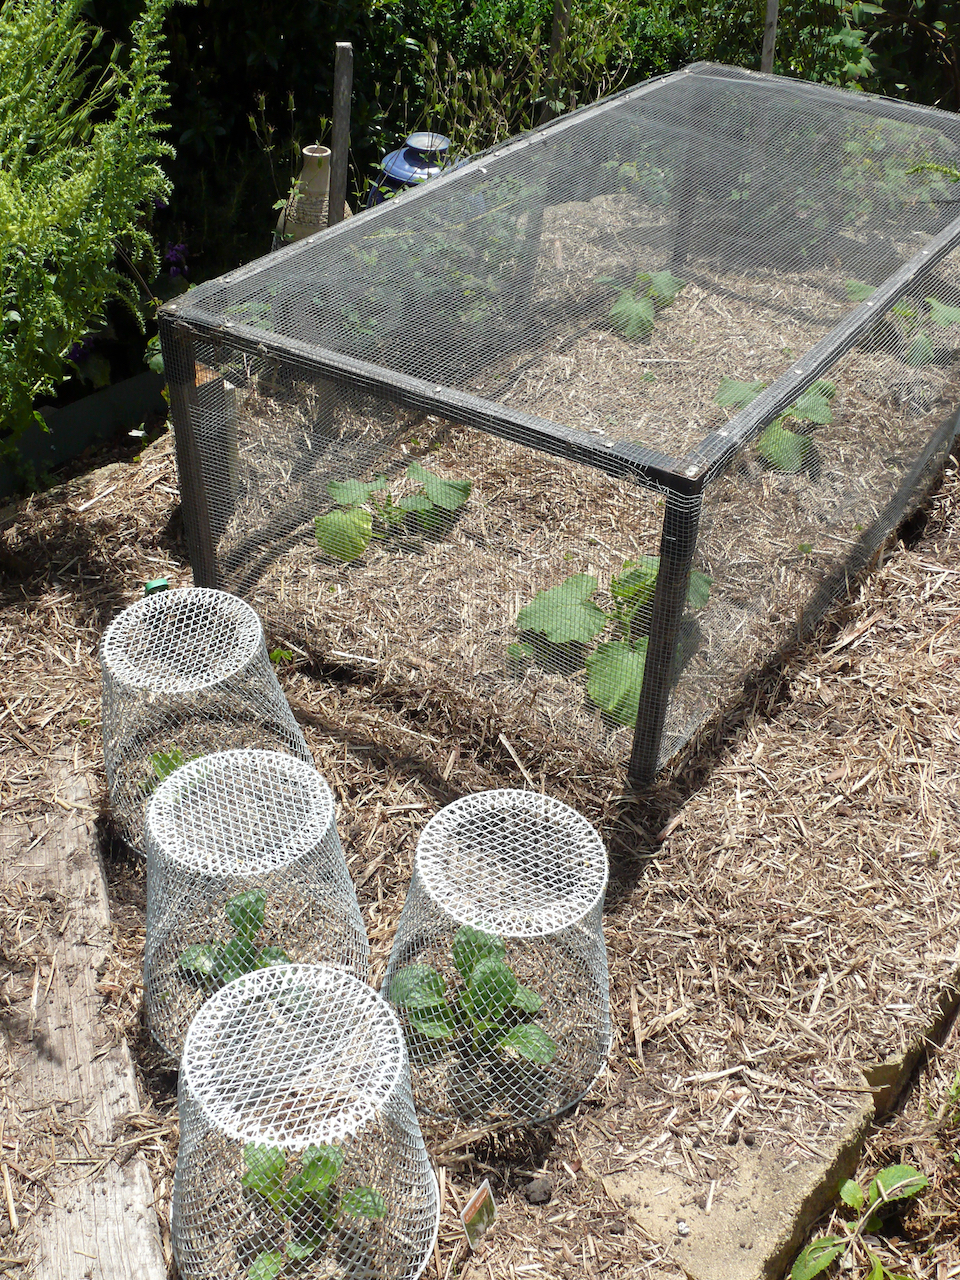
- Exclusion: keep White Butterflies out with either a cage made out of fine mesh or netting or, when plants are young, paper waste baskets (foreground in photo below).
- Bacillus thuringiensis: many food-gardeners use Dipel, which the trade name of a product containing bacterium Bacillus thuringiensis or Bt. It is a biological pesticide that is considered environmentally friendly because it very specifically targets caterpillars with little or no effect on humans, wildlife, pollinators and most other beneficial insects. Caterpillars that ingest Dipel stop feeding almost immediately and die a few days later. Add a couple of drops of dishwashing liquid to the Dipel to make it stick better to plants. Spray Dipel all over and under leaves, so whatever caterpillars munch from there on has Dipel on it. Rain or overhead irrigation will wash it off. Repeat applications of Dipel every 5-7 days or after rain or overhead irrigation. For more info see blog post Butterflies, Moths and Brassicas.
Aphids arrive on the wind and love sheltered places where plants are (too) close together. Warm humid weather will see them thrive. The simplest organic and cheapest method of keeping aphids under control and ultimately to get rid of them is to spray the insects themselves (ie. not the plants they sit on) once a day with dishwashing liquid in water.
I sowed Cucumbers this spring, but have not mentioned them so far. That is because I have come to the conclusion that these plants, that look so much like pumpkins when they are young, are much less hardy than pumpkins. Last year mid November I planted both pumpkins and cucumbers in my garden, and put protective plastic jackets around them. Then we had a fortnight of 'winter'. My pumpkins all survived. My cucumber plants all died!
This year I have planted my cucumbers in salvaged recycling bins (see photo), and surrounded them with a protective glass frame.
 |
| Cucumbers just after planting |
I recommend that people who live in cool micro-climates put their cucumbers, capsicums, and even tomatoes in pots and trays. These are plants that are not ideal for Tasmania's unpredictable often cool summers. The soil in pots and trays will be a few degrees warmer than soil in your garden, and that will make a big difference.
But, because of the slightly-higher temperature, soil in pots and trays dries out more quickly. For that reason do not use ordinary garden soil or compost. The soil in my cucumber trays is 9 parts of compost + 3 parts of coir + 2 parts of sand + 2 parts of sheep manure + ½ part of coffee grinds + a handful of complete organic fertiliser (COF). Water will permeate this mix much better. Pots and trays need more regular watering than normal garden soil.
Corn, capsicums and chillies are other options for the Big Eater area. For more info about them see Vegie Patch Basics - 5 .
Roots area
Leek, garlic, spring onions and green manure over winter, followed by carrots, parsnips, beetroot, swedes, radish, turnips over summer.
Where are we at?
All green manures should, by now, be a thing of the past - over and done with - chopped up and worked into the soil some time ago.
Many of the crops grown in the Roots area will not grow well if you add manure or nitrogen-rich fertilisers, so please desist! More is not always better! If the soil in your Roots area is clearly depleted, add some compost, but I would add no more than that, except if it is heavy and dense, then please add gypsum.
When is the right time to harvest garlic was a topic of discussion on our Facebook page during November.

The photo above showed the garlic in our garden a few weeks ago, and it was clearly still going strong. Garlic is ready for harvest when the foliage begins to die back. That moment depends on the variety and the conditions under which plants are grown. I have heard the saying 'plant garlic on the shortest day, and harvest it on the longest day', but most years I plant garlic earlier than that, and simply let it grow until the plants tell me that it is time.
October - November was a good time to sow carrots, parsnips and beetroot, but you can still do that now, in fact all the time right up to March. My plan is to sow parsnips where the garlics are now, so they won't be sown for another few weeks.
Swedes, radishes and turnips can also be sown at any time until temperatures begin to go down in Autumn.
Thinning is the process of pulling out small seedlings to allow the ones that remain to reach full size. Ideally you would sow seeds so thinly that you don't have to thin them. I have a steady hand and lots of experience, but always need to thin my root crops. It's unpleasant to decide 'who gets to stay, and who is removed', but it is a task that needs to be done if you want good size root vegetables.


The photos above show seedlings not long after germination. The top photo is before thinning. The bottom photo is after thinning. Ideally, after thinning, a seedling is far enough away from other seedlings, so when the root has reached full width, it still does not quite touch any other roots. The photo below shows mature carrots that were thinned properly. Look how far away from each other the centres of these carrots are. The seedlings in the photo above may need a second thinning later on.

Thinning is best done soon after germination. The longer you wait, the harder the job. There will be more weeds, more foliage to confuse you, and the roots will be longer and therefore harder to pull out. Water seedlings before thinning if the soil is not moist, because roots will more readily come out (instead of just the above ground bit of the seedling breaking off), if the soil is soft.
I use a pair of long tweezers. They allow me to precisely grab the seedling that needs to be removed and pull it out.
Some people avoid thinning by using seed tape. A limited selection of root crops can be purchased in the form of seed tape. You also can make your own (see Making your own seed tapes on this blog). Disadvantage of seed tapes can be that if the seed used in the seed tape is not 100% fresh and viable, you may have many gaps in your rows where seeds did not germinate.
Solanums area
potatoes and tomatoes
Where are we at?
Where are we at?
The Solanums area ideally has well-draining good quality soil, to which no manure or compost or fertilisers are added. If you add those, your potatoes and tomatoes will accept them enthusiastically, grow to great height, and focus on forming great quantities of leaves, rather than potatoes and tomatoes.
I sowed Pink Eye potatoes in early September. They have now (end of November) been flowering for some weeks. I planted King Edwards potatoes in early October and they are not flowering yet.
By choosing your varieties well, and planting them with weeks or months in between, you can spread your harvest, and that is appealing because fresh-out-of-the-ground potatoes often taste much more delicious than those that have been stored in a dark place.
Tasmania has just the right climate for potatoes. Pests and diseases are not common in potatoes. If you happen to see leaves with Rust, remove those leaves. That Rust, by the way, is not the same Rust as you may have on your raspberries or broad beans. It is a different species. It may look the same, but Rust is not transferred from one plant variety to another.
Hill your potatoes if you have not already done so. 'Hilling' means putting soil, compost, straw, or whatever organic matter you have, around the base of potato plants to encourage the plant to produce more potatoes. If you don't hill your potatoes, then the ones that form with little or no soil on top, will go green. Green potatoes are slightly poisonous, and should be thrown out. In other words, you lose part of your crop.
After flowering, potato plants form non-edible, cherry-tomato-sized fruits - not surprising because tomatoes and potatoes belong to the same plant family. Their foliage then begins to die down.
Officially potatoes are ready for harvesting when their foliage is completely dead. However, if you don't want to wait that long, you can carefully fossick in the soil that you used to hill your potatoes and dig out one or two potatoes per plant, while leaving the rest in the ground. Australians have a wonderful term for this. They call it 'bandicooting'.
When harvesting potatoes, make sure you remove all of them, even the smallest ones, otherwise you will have potatoes coming up in this same spot next season. That can be quite a nuisance if it right under a newly-sown row of peas! Potato roots and foliage (not the potatoes themselves) can be put on the compost heap, no problem, as long as you make sure they are properly composted thereafter.
It is now definitely warm enough to plant tomato seedlings in your garden soil. Protective plastic jackets can still be put around plants, but should be removed as the weather warms up, so plants don't become too hot. If you live in a windy area consider some sort of temporary windbreak eg a row of shade cloth supported by sturdy stakes. Most tomato varieties need support as they grow, which you can put in place as you plant them (stakes, suspended strings, etc).
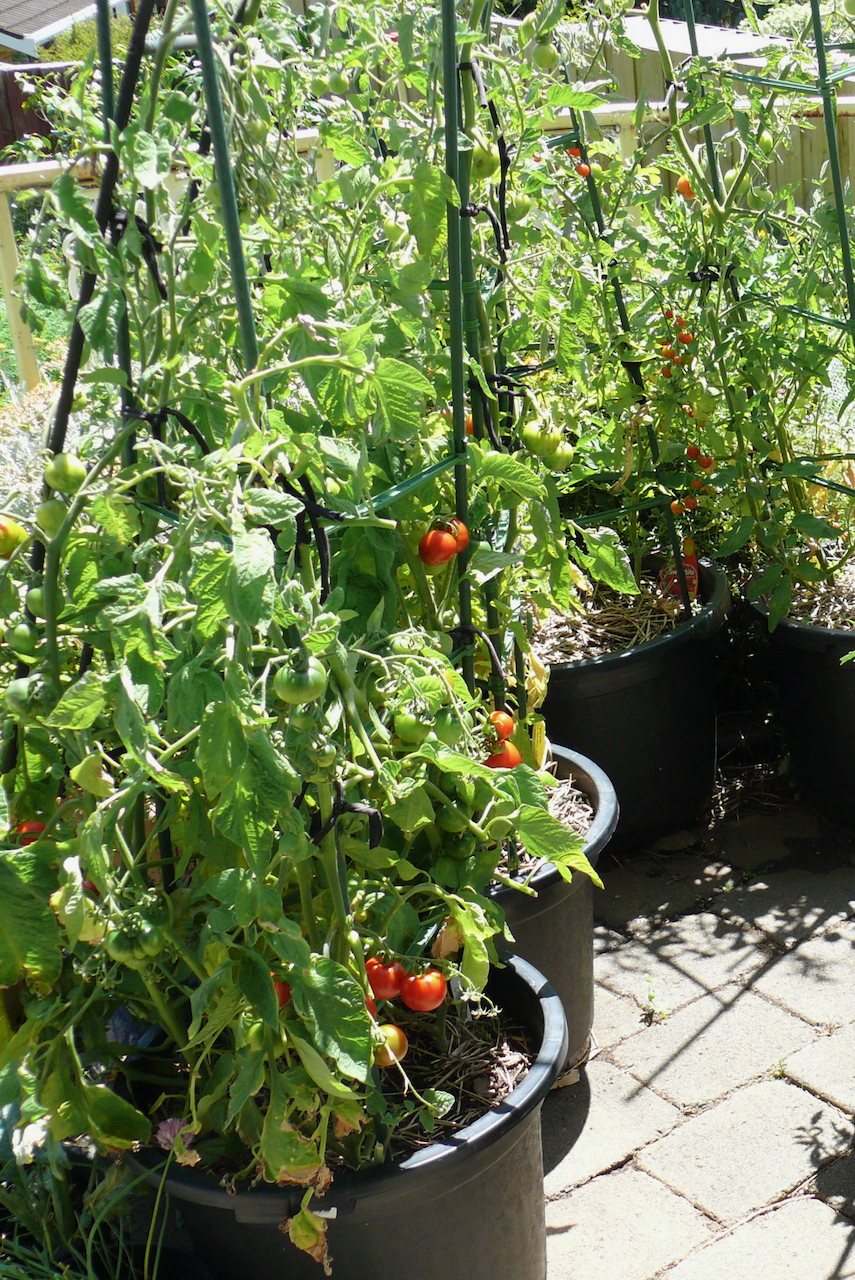
You can continue sowing tomatoes and planting seedlings in pots or out into your garden soil until early January. In most summers you can expect to have ripe tomatoes from those late-sown plants by the end of March or early April, because when temperatures are right, tomato plants get on with the job!
Egg plant (aubergine) is another member of the Solanums family, but they need so much constant warmth that in Tasmania they will only be a success in gardens with a warm micro-climate or a hot house.
This Veggie Patch Basics series will continue with Veggie Patch Basics 7 (February - March).
No comments:
Post a Comment
Note: Only a member of this blog may post a comment.